Clone ESXi host USB/SD media
There’s an inspirational post on how to run headless ESXi on Atom-based motherboards like N3050/N3150/J3160 and the newer Kaby Lake. Of the latest updates to the post is the author’s proposal for iPXE setup from an image hosted on his server. That simplifies matters a lot but it also allows unattended setup to the Flash media. That came about quite interesting for me.
Natural question that comes up next is how to backup your ESXi host on a USB stick. There are a few tutorials out there which set some guidelines. But in the end they all fail in real-ife situtations. To do the backup one will have to have a flash card which is either same size or larger. Moreover, in most cases even same size USBs are not entirely the same size: few sectors could be reserved or disabled by the flash firmware due to failure or manufacturing quality check. To add insult to injury, one day I wanted to swap flash drive to a smaller one. All that generally fails with pure DD-based or Windows flash imaging tools.
To find a workaround I had to search for some general guides, and a few of those relating to cloning Raspberry images came of real use. The idea was to find a way how to remove empty space in the DD image. The simple answer was to use ‘truncate‘ tool. However, getting a close look at the structure of ESXi host partitions, I realised I would need to fix partition tables after my barbarian “surgery”. Luckly, there’s a great tool to do almost everything and automatically. Finally, once we copy our truncated image back to the destination media we will have to do yet another small fix. This time with a nice tool called ‘sfdisk‘ (make sure your ‘sfdisk’ is at least version 2.26).
So, here’s the detailed how-to:
– make an image of your running ESXi host. Enable SSH and login to the host. Now, clone your Flash to some VMFS storage:
sudo dd if=/dev/disks/mpx.vmhba32:C0:T0:L0 | gzip > /vmfs/volumes/[your-VMFS-storage]/imagename.img.gz- Here comes the funny thing. Most of the guides propose to compress image. However, if your USB stick was previously used then the free space will have some data, i.e. non-zeros. And therefore gzip will not do anything to it so as your compressed image size will be almost the same size. Just note that this is expectied, I give the full guide as a general proposal.
– Get hold of some linux machine. If you are on Windows, the easiest would be to install VMWare Workstation and download Ubuntu image. Workstation will offer you simplified installation for your Ubuntu: one just need to boot from a CD-ROM with Ubuntu ISO attached and wait a few minutes till you see login prompt. Once you logged on to linux, copy your image to the linux box with scp.
– Unzip your image:
gunzip imagename.img.gz– Now, let’s do the rough thing – truncate our image. See what’s the last occupied sector in our image.
andrey@ubuntu:~$ gdisk -l imagename.img
GPT fdisk (gdisk) version 1.0.1

Partition table scan:
MBR: protective
BSD: not present
APM: not present
GPT: present

Found valid GPT with protective MBR; using GPT.
Disk imagename.img: 7086150 sectors, 3.4 GiB
Logical sector size: 512 bytes
Disk identifier (GUID): B2DC4DD8-6875-458C-83A8-41F0D1709BCD
Partition table holds up to 128 entries
First usable sector is 34, last usable sector is 7086116
Partitions will be aligned on 32-sector boundaries
Total free space is 195 sectors (97.5 KiB)

Number  Start (sector)    End (sector)  Size       Code  Name
1              64            8191   4.0 MiB     EF00
5            8224          520191   250.0 MiB   0700
6          520224         1032191   250.0 MiB   0700
7         1032224         1257471   110.0 MiB   FC00
8         1257504         1843199   286.0 MiB   0700
9         1843200         7086079   2.5 GiB     FC00
This is ‘7086079’. However, since this is GPT disk, there will be another 32 sectors of the backup GPT partition table. Therefore we should trunctate at least at 7086079+1+32. I suggest to add something extra, say another 32 blocks. Just in case. (Wiki says Linux GPT allows 256 partition entries which has a size of 64 blocks). Therefore the final command will look as follows:
truncate -s $(((7086079+1+32+32)*512)) imagename.imgNext comes the most interesting part. Let’s open our truncated image with gdisk and do verification. It will complain about 5 errors. They are all self-explanatory, you may consult with gdisk manual.
gdisk imagename.img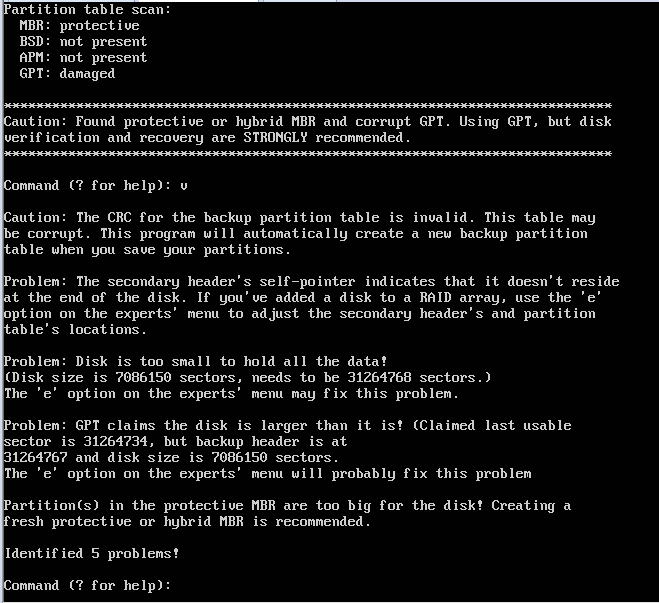
– Let’s fix all those errors. Chose ‘r’ for ‘recovery and transformation options’, and then ‘e’ to rebuild our backup GPT table which was truncated along with free space.
– Next we need to adjust partition size in our protective MBR because it still shows original -large- size. For that type ‘x’ for ‘extra functionality’ and then ‘h’ for ‘recompute CHS values in protective’. Finally, type ‘w’ to write all changes to the image. Once done, check our image again by opening it up in gdisk and selecting ‘v’ to verify. You should see something like this which probably indicates that the actual parition table size is still 32 sectors and therefore we have some free space left between the last partition and backup table:
Command (? for help): v

No problems found. 195 free sectors (97.5 KiB) available in 6
segments, the largest of which is 37 (18.5 KiB) in size.
After that type ‘q’ to quit without changes.
Now, let’s copy our truncated and corrected image back to the new media. (Mine was dropping with write errors somewhere in the middle. Therefore I zeroed the whole Flash before writing. Then it came just smoothly.). I like ‘dc3dd’ instead of plain old ‘dd’ becuase it allows one to see progress of the operation as well as to set the speed of read operations.
sudo dc3dd if=/dev/zero of=/dev/[your Flash, mine was ‘sdb’]

sudo dc3dd ssz=512 if=/home/andrey/imagename.img of=/dev/sdb
Finally, the last fix. As it turns out dd rewrites partition table numbers. Just compare those in your source image in the previous step:
andrey@ubuntu:~$ gdisk -l esxi-15.05.2017.img
GPT fdisk (gdisk) version 1.0.1

Partition table scan:
MBR: protective
BSD: not present
APM: not present
GPT: present

Found valid GPT with protective MBR; using GPT.
Disk imagename.img: 7086150 sectors, 3.4 GiB
Logical sector size: 512 bytes
Disk identifier (GUID): B2DC4DD8-6875-458C-83A8-41F0D1709BCD
Partition table holds up to 128 entries
First usable sector is 34, last usable sector is 7086116
Partitions will be aligned on 32-sector boundaries
Total free space is 195 sectors (97.5 KiB)

Number  Start (sector)    End (sector)  Size       Code  Name
1              64            8191   4.0 MiB     EF00
5            8224          520191   250.0 MiB   0700
6          520224         1032191   250.0 MiB   0700
7         1032224         1257471   110.0 MiB   FC00
8         1257504         1843199   286.0 MiB   0700
9         1843200         7086079   2.5 GiB     FC00
With those in your newly created Flash:
andrey@ubuntu:~$ gdisk -l /dev/sdb
GPT fdisk (gdisk) version 1.0.1

Partition table scan:
MBR: protective
BSD: not present
APM: not present
GPT: present

Found valid GPT with protective MBR; using GPT.
Disk /dev/sdb: 7086150 sectors, 3.4 GiB
Logical sector size: 512 bytes
Disk identifier (GUID): B2DC4DD8-6875-458C-83A8-41F0D1709BCD
Partition table holds up to 128 entries
First usable sector is 34, last usable sector is 7086116
Partitions will be aligned on 32-sector boundaries
Total free space is 195 sectors (97.5 KiB)

Number  Start (sector)    End (sector)  Size       Code  Name
1              64            8191   4.0 MiB     EF00
2            8224          520191   250.0 MiB   0700
3          520224         1032191   250.0 MiB   0700
4         1032224         1257471   110.0 MiB   FC00
5         1257504         1843199   286.0 MiB   0700
6         1843200         7086079   2.5 GiB     FC00
To fix that we will will use ‘sfdisk’ utility:
sudo sfdisk -d /dev/sdb > /home/andrey/sdb.bkp

sudo nano sdb.bkp
This will show us partition table in a well readable form:
label: gpt
label-id: B2DC4DD8-6875-458C-83A8-41F0D1709BCD
device: /dev/sdb
unit: sectors
first-lba: 34
last-lba: 15685598

/dev/sdb1 : start=          64, size=        8128, type=C12A7328-F81F-11D2-BA4B-00A0C93EC93B, uuid=7A79CD73-38D3-442B-A892-D1815F1E0B06
/dev/sdb2 : start=        8224, size=      511968, type=EBD0A0A2-B9E5-4433-87C0-68B6B72699C7, uuid=25697965-03AE-48AA-A303-676B0173A587
/dev/sdb3 : start=      520224, size=      511968, type=EBD0A0A2-B9E5-4433-87C0-68B6B72699C7, uuid=9F12DF08-43FF-4E1E-BFA7-2EDFFE5CE561
/dev/sdb4 : start=     1032224, size=      225248, type=9D275380-40AD-11DB-BF97-000C2911D1B8, uuid=FCC7120C-DAF8-4E9C-BBDC-0A28B2DF9E6E
/dev/sdb5 : start=     1257504, size=      585696, type=EBD0A0A2-B9E5-4433-87C0-68B6B72699C7, uuid=8423212A-13B2-4A13-916F-FF20577BE201
/dev/sdb6 : start=     1843200, size=     5242880, type=9D275380-40AD-11DB-BF97-000C2911D1B8, uuid=71AAE267-1BBD-4B28-92B6-FE686FA1BB02
We will simply need to rename those partitions as we like, that is: 1,5,6,7,8,9. Then save the file and insert this table back into the Flash disk. The tool will automatically adjust backup table.
sudo sfdisk –no-reread -f /dev/sdb < /home/andrey/sdb.bkpAnd that is it! You Flash is now ready to boot ESXi with running config.